
The good news? Not every fence requires professional expertise, heavy machinery, or days of digging. Thanks to modern fencing systems, many options are specifically designed for homeowners with little to no construction experience.
Professional fence installation typically costs $27 to $40 or more per linear foot, while DIY material costs generally range from $5 to $18 per linear foot for many fence types. Depending on your project, installing your own fence can reduce overall costs by 40% to 70%.
This guide ranks the seven easiest fences to install yourself, explains why they’re beginner-friendly, compares costs and difficulty levels, and helps you choose the right option for your property.
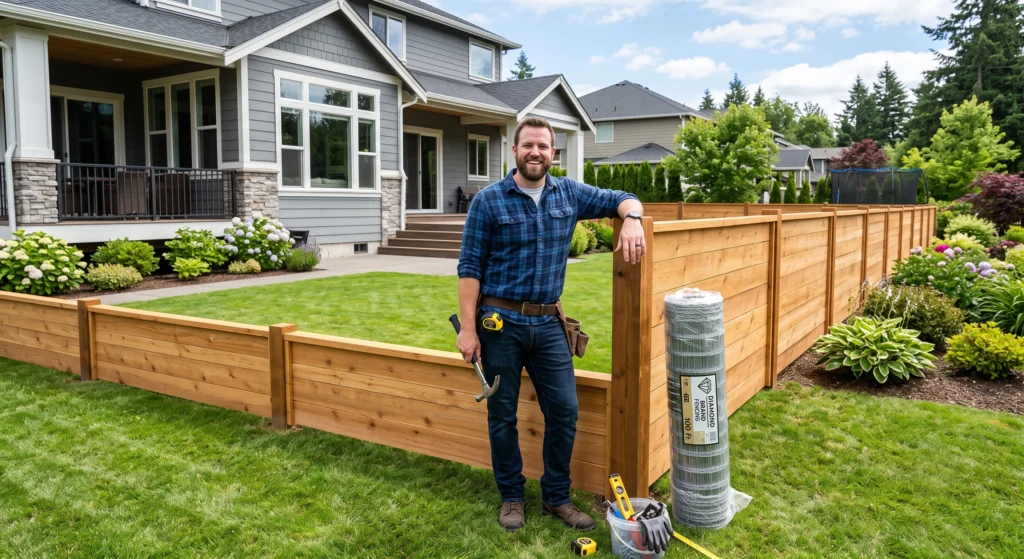
What Makes a Fence “Easy” to Install?
Not all DIY fencing projects require the same amount of work. Some systems are engineered for quick installation, while others demand careful measuring, cutting, and post-setting.
Several factors determine how beginner-friendly a fence will be.
1. Lightweight Materials
Heavy fencing materials require multiple people to lift, position, and secure. Lightweight materials reduce physical strain and speed up installation.
Generally speaking:
- Vinyl panels are relatively lightweight.
- Aluminum panels are easy to handle.
- Chain link mesh comes in manageable rolls.
- Wire fencing is extremely light.
- Bamboo rolls are easy to carry.
Stone, brick, and solid hardwood fencing are much heavier and significantly harder to install.
2. Pre-Fabricated Components
One of the biggest time savers is buying fencing that arrives partially assembled.
Instead of measuring, cutting, and attaching every individual piece, pre-built systems simply connect together.
Examples include:
- Vinyl privacy panels
- Modular aluminum fences
- Pre-built wood fence panels
- No-dig fencing kits
These eliminate many opportunities for installation mistakes.
3. Minimal Digging
Digging post holes is often the hardest part of fence installation.
Traditional fencing requires:
- Measuring every post location
- Digging deep holes
- Mixing concrete
- Waiting for curing
By comparison, no-dig fence systems use steel spikes driven directly into the ground, eliminating hours of labor.
Less digging generally means:
- Faster installation
- Less equipment
- Less landscape damage
- Lower labor requirements
4. Simple Tool Requirements
Beginner-friendly fencing usually requires only common household tools.
Typical DIY tools include:
- Tape measure
- Rubber mallet
- Hammer
- Level
- Drill
- String line
- Wrench set
More advanced fencing often requires power augers, concrete mixers, circular saws, or specialized tensioning equipment.
5. Straightforward Assembly
Some fence systems practically assemble themselves.
Look for features such as:
- Interlocking panels
- Snap-together rails
- Pre-drilled holes
- Color-coded hardware
- Factory-cut components
The fewer cuts and adjustments required, the easier the installation becomes.
A Simple Formula for Installation Ease
You can think of installation difficulty like this:
Ease = (Pre-Fabrication × Lightweight Materials) ÷ (Digging + Specialized Tools + Assembly Complexity)
The more pre-built and lightweight a fence is—and the less digging and cutting it requires—the easier it will be for the average homeowner.
Which DIY Skill Level Fits You?
Beginners
If you’ve never built anything larger than a bookshelf, start with:
- No-dig fences
- Vinyl panel systems
- Wire mesh fencing
These are forgiving and require minimal experience.
Intermediate DIYers
If you’re comfortable using power tools and following construction plans, you’ll likely succeed with:
- Chain link fencing
- Pre-fabricated wood panels
- Modular metal fencing
Advanced Builders
Custom-built wood fencing, masonry walls, and decorative stone fences involve precise carpentry or masonry work and are generally better suited for experienced builders or professionals.
#1 No-Dig Fences (Easiest Overall)
If your goal is to install a fence as quickly and easily as possible, no-dig fencing is the clear winner.
Instead of excavating post holes and pouring concrete, these systems use galvanized steel spikes that are driven directly into the ground. Fence panels then slide or bolt onto the posts.
Why They’re So Easy
No-dig systems eliminate the most time-consuming part of fence installation.
Advantages include:
- No post holes
- No concrete mixing
- No waiting for concrete to cure
- Minimal lawn damage
- Few tools required
- Installation often completed in a single day
Many homeowners can complete a small backyard project in just a few hours.
Available Materials
No-dig systems come in several styles:
| Material | Best For | Maintenance |
| Vinyl | Privacy | Occasional washing |
| Aluminum | Decorative fencing | Very low |
| Steel | Security | Minimal |
| Wood | Traditional appearance | Requires staining or sealing |
Best Applications
No-dig fencing works well for:
- Decorative borders
- Garden fencing
- Front yard accents
- Temporary fencing
- Small pets
- Landscaping projects
Limitations
While incredibly easy to install, no-dig systems aren’t ideal for every situation.
They’re generally not recommended for:
- Large dogs that push against fences
- High-security applications
- Extremely rocky ground
- Steep slopes
- Heavy privacy fencing
Estimated Cost
$5–$15 per linear foot
Difficulty Rating
⭐☆☆☆☆ (1/5)
#2 Chain Link Fences
Chain link fences have been a favorite DIY project for decades because nearly every component is standardized.
Posts, rails, mesh, and hardware are designed to work together, making the installation process relatively straightforward.
Although you’ll need to dig post holes, the remaining steps are easy to follow.
Why They’re Beginner-Friendly
Chain link systems offer:
- Standardized components
- Predictable assembly
- Lightweight wire mesh
- Affordable materials
- Widely available replacement parts
Unlike custom wood fencing, there is very little cutting involved.
Typical Installation Steps
- Mark the fence line.
- Dig post holes.
- Set posts in concrete.
- Install top rails.
- Stretch chain link fabric.
- Secure with tension bars and ties.
- Install gate hardware.
The only challenging part is stretching the mesh tight enough to prevent sagging.
Best Uses
Chain link fencing is ideal for:
- Backyard boundaries
- Dog enclosures
- Property lines
- Garden protection
- Large yards
Privacy slats can also be added later if desired.
Estimated Cost
$8–$18 per linear foot
Difficulty Rating
⭐⭐☆☆☆ (2/5)
#3 Vinyl Fences
Vinyl fencing has become one of the most popular residential fencing options because it combines attractive appearance with exceptionally low maintenance.
Modern vinyl fencing typically comes in pre-manufactured panels that slide or lock into routed posts.
There is no painting, staining, or sealing required.
Why Vinyl Is Easy to Install
Vinyl fence systems simplify installation by providing:
- Factory-cut panels
- Interlocking rails
- Lightweight materials
- Uniform sizing
- Pre-engineered hardware
Most of the work involves accurately placing the posts. Once they’re installed, assembling the fence is surprisingly straightforward.
Installation Overview
The process typically follows these steps:
- Measure and mark the fence line.
- Dig post holes.
- Set posts according to manufacturer specifications.
- Insert rails.
- Slide panels into place.
- Install post caps.
- Hang gates if included.
Advantages
Vinyl offers numerous long-term benefits:
- Won’t rot
- Doesn’t rust
- Never needs painting
- Resistant to insects
- Easy to clean
- Available in many styles and colors
Many high-quality vinyl fences last 30 to 50 years with minimal maintenance.
Best Uses
Vinyl fencing works especially well for:
- Backyard privacy
- Pool enclosures
- Modern homes
- Family yards
- HOA communities
Estimated Cost
$15–$40 per linear foot
Difficulty Rating
⭐⭐⭐☆☆ (3/5)
#4 Pre-Fabricated Wood Panel Fences
If you love the timeless appearance of a wooden fence but want to avoid the hassle of installing every individual picket, pre-fabricated wood panels are an excellent compromise.
Instead of assembling the fence from scratch, you’ll purchase ready-made panels—typically 6 feet high by 8 feet wide—that can be attached directly to installed fence posts. This significantly reduces labor while delivering the traditional look many homeowners prefer.
Why They’re Easier Than Custom Wood Fences
Building a traditional wood fence requires cutting, spacing, fastening, and leveling dozens—or even hundreds—of pickets. Pre-fabricated panels eliminate most of that work by arriving fully assembled.
Benefits include:
- No measuring and spacing individual pickets
- Factory-built panels save hours of assembly
- Standard dimensions simplify planning
- Available at nearly every home improvement store
- Compatible with pressure-treated pine, cedar, and redwood options
The main challenge is setting sturdy, level fence posts because the finished panels depend on proper post alignment.
Installation Steps
A typical installation follows these steps:
- Measure and mark your fence layout.
- Dig post holes approximately 6 to 8 feet apart.
- Pour concrete and set the posts.
- Allow the concrete to cure according to the manufacturer’s recommendations.
- Attach the pre-built panels using galvanized screws or brackets.
- Install post caps and gates.
Because the panels are already square and level, installation progresses much faster than building from individual boards.
Best Uses
Pre-fabricated wood fences are ideal for:
- Backyard privacy
- Pet containment
- Traditional suburban homes
- Decorative property boundaries
- Noise reduction
Pros
- Classic natural appearance
- Strong and durable
- Easy to customize with paint or stain
- Faster than building from scratch
- Readily available in multiple wood species
Cons
- Requires concrete footings
- Heavier than vinyl panels
- Periodic staining or sealing required
- Wood can warp over time if not maintained
Estimated Cost
$12–$25 per linear foot
Difficulty Rating
⭐⭐⭐☆☆ (3.5/5)
#5 Modular Metal Frame Fences
Modular metal fencing systems have become increasingly popular because they combine sleek, contemporary design with straightforward installation.
Most systems consist of pre-manufactured aluminum or steel frames that bolt together using standardized hardware. Homeowners can often choose decorative infill panels, horizontal slats, composite inserts, or privacy screens.
Why They’re DIY-Friendly
Unlike welded custom fencing, modular systems are engineered specifically for straightforward assembly.
Advantages include:
- Factory-made components
- Minimal cutting required
- Strong but lightweight materials
- Clear installation instructions
- Excellent long-term durability
Most homeowners only need to install the posts accurately before assembling the panels.
Installation Overview
Typical installation includes:
- Plan and mark the fence line.
- Dig and install fence posts.
- Verify all posts are plumb and evenly spaced.
- Attach horizontal rails.
- Bolt panels into place.
- Install decorative caps and gates.
Many manufacturers include all required fasteners in the kit, simplifying the project even further.
Best Uses
Metal frame fencing works well for:
- Modern homes
- Front yard fencing
- Decorative boundaries
- Pool fencing
- Low-maintenance landscapes
Pros
- Modern appearance
- Rust-resistant finishes
- Minimal maintenance
- Long service life
- Modular expansion options
Cons
- Higher upfront cost
- Less privacy unless infill panels are used
- Posts still require concrete foundations
Estimated Cost
$10–$30 per linear foot
Difficulty Rating
⭐⭐⭐⭐☆ (4/5)
#6 Wire Mesh (Welded Wire) Fences
Wire mesh fencing is one of the simplest and most affordable fencing options available. Rather than using heavy panels, this system consists of galvanized wire mesh attached to evenly spaced wooden or metal posts.
Because there are relatively few components, installation can often be completed in a single day.
Why It’s Easy to Install
Wire mesh fencing uses only a handful of materials:
- Fence posts
- Galvanized welded wire
- Staples or clips
- Corner braces
Many garden installations don’t even require concrete if heavy-duty metal stakes are used.
Installation Process
The basic steps include:
- Install corner posts.
- Set intermediate posts at equal intervals.
- Roll out the wire mesh.
- Pull the mesh tight.
- Secure with staples or fencing clips.
- Trim excess wire.
The simplicity of the design makes mistakes relatively easy to correct.
Best Uses
Wire mesh fencing is ideal for:
- Vegetable gardens
- Chicken runs
- Small livestock
- Backyard pet areas
- Property markers
Pros
- Very affordable
- Quick installation
- Lightweight materials
- Excellent visibility
- Low maintenance
Cons
- Limited privacy
- Less attractive than decorative fencing
- Not ideal for high-security applications
Estimated Cost
$6–$14 per linear foot
Difficulty Rating
⭐⭐☆☆☆ (2.5/5)
#7 Bamboo Fences
For homeowners seeking a warm, natural appearance, bamboo fencing provides one of the most affordable and environmentally friendly solutions.
Most DIY bamboo fences use rolled bamboo screens that attach to an existing wooden frame or newly installed posts.
Why Bamboo Is Relatively Easy
Bamboo is naturally lightweight, making it easy to transport and handle during installation.
Unlike many wood fences, bamboo rolls require little measuring or cutting.
Most installations involve:
- Installing support posts
- Attaching horizontal rails
- Securing bamboo rolls with screws or galvanized wire
Because the bamboo itself is already assembled into rolls, installation progresses quickly.
Best Uses
Bamboo fencing works beautifully for:
- Garden privacy
- Patio screening
- Tropical landscaping
- Decorative backyard spaces
- Zen gardens
Pros
- Extremely affordable
- Eco-friendly
- Lightweight
- Unique natural appearance
- Easy to install over existing fencing
Cons
- Shorter lifespan than vinyl or aluminum
- Requires weather protection
- Can fade over time
- Less suitable for high-security applications
Estimated Cost
$2–$8 per linear foot
Difficulty Rating
⭐⭐⭐☆☆ (3/5)
Comparison Table: The Easiest Fences to Install Yourself
| Fence Type | Difficulty | Typical Installation Time | DIY Cost (Per Linear Foot) | Maintenance | Best For |
| No-Dig Fence | ⭐☆☆☆☆ | Less than 1 day | $5–$15 | Low | Decorative borders, temporary fencing |
| Chain Link | ⭐⭐☆☆☆ | 1–2 days | $8–$18 | Low | Pets, property boundaries |
| Vinyl | ⭐⭐⭐☆☆ | 1–2 days | $15–$40 | Very Low | Privacy, pool enclosures |
| Pre-Fabricated Wood | ⭐⭐⭐☆☆ | 2–3 days | $12–$25 | Medium | Traditional privacy fencing |
| Modular Metal | ⭐⭐⭐⭐☆ | 1–2 days | $10–$30 | Low | Modern homes, decorative fencing |
| Wire Mesh | ⭐⭐☆☆☆ | 1 day | $6–$14 | Low | Gardens, small animals |
| Bamboo | ⭐⭐⭐☆☆ | 2–3 days | $2–$8 | Medium | Decorative garden screening |
Step-by-Step: How to Install a No-Dig Fence
If you’re a first-time DIYer, a no-dig fence is the perfect place to start. These systems eliminate the need for post-hole digging and concrete, allowing most homeowners to complete the project in a single weekend.
Step 1: Check Local Regulations
Before purchasing materials, verify your local building requirements.
Be sure to check:
- Fence height restrictions
- Property setback rules
- HOA requirements
- Required permits
- Shared boundary regulations
Spending a few minutes on research can prevent expensive corrections later.
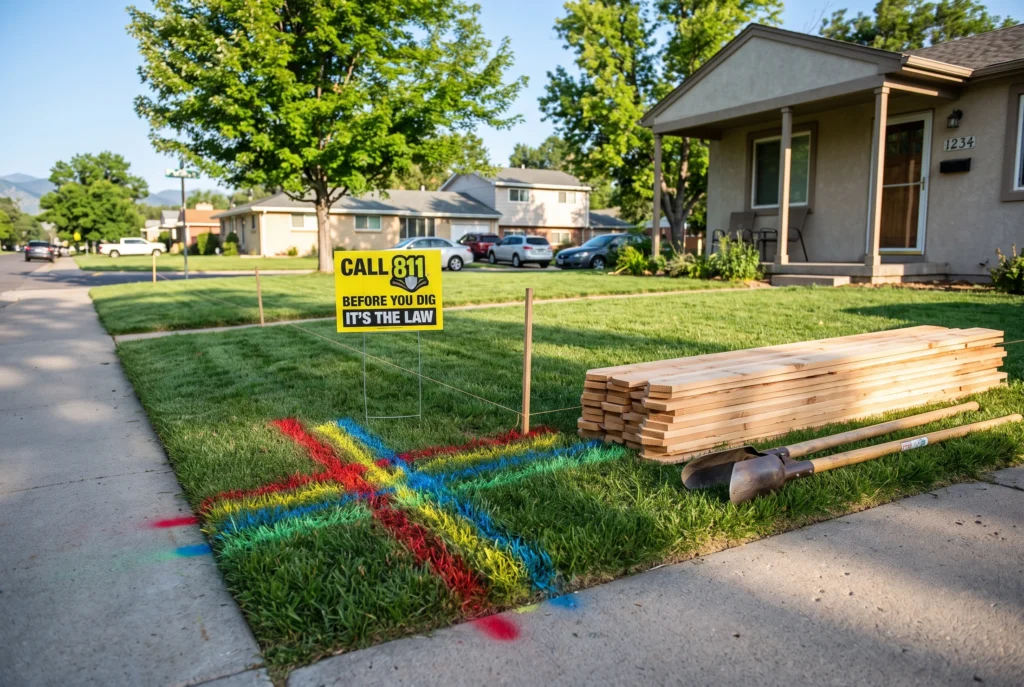
Step 2: Locate Underground Utilities
Even though no-dig fences don’t require excavation, metal spikes are driven into the ground and can still contact underground utilities.
Before beginning:
- Contact your local utility locating service.
- Wait until underground lines are marked.
- Never guess where gas, water, or electrical lines are located.
Safety should always come first.
Step 3: Measure and Mark the Fence Line
Use:
- Wooden stakes
- Mason’s string
- Tape measure
- Marking paint (optional)
Stretch a string tightly between stakes to create a perfectly straight installation line.
Measure carefully before placing the first post.
Step 4: Gather Your Materials
Most no-dig fence kits require only a few basic tools:
Materials
- No-dig fence panels
- Steel spike posts
- Gates (if needed)
- Mounting hardware
Tools
- Rubber mallet or sledgehammer
- Post driver (recommended)
- Block of wood
- Tape measure
- Level
- Work gloves
- Safety glasses
Step 5: Drive the Ground Spikes
Position the first spike directly on your string line.
Place the wooden block over the spike to protect its finish.
Using a post driver or heavy mallet, drive the spike into the ground gradually.
Every few strikes:
- Check vertical alignment with a level.
- Make small corrections immediately.
- Continue until the spike reaches the recommended depth.
Repeat for each post location.
Step 6: Install the Fence Panels
Once the posts are secure:
- Slide each panel into the designated brackets or channels.
- Fasten the panels according to the manufacturer’s instructions.
- Verify that each section remains level before tightening all hardware.
This stage usually progresses quickly because the panels are pre-manufactured.
Step 7: Install Gates and Accessories
If your fence includes a gate:
- Attach hinges to the gate post.
- Verify smooth operation before tightening bolts.
- Install the latch.
- Test opening and closing several times.
Adjust hinges if necessary to ensure proper alignment.
Step 8: Final Inspection
Walk the entire fence line and check for:
- Loose fasteners
- Uneven panels
- Leaning posts
- Sharp edges
- Proper gate operation
Making minor adjustments now helps ensure your fence remains sturdy and attractive for years to come.
Pro Tips for First-Time Installers
- Work with a helper when handling larger panels.
- Use a post driver instead of a standard hammer whenever possible for straighter, more secure installations.
- Measure twice before driving each post.
- Install a short test section before committing to the entire fence line.
- Avoid working during heavy rain, as saturated soil can affect post stability.
- Keep a level handy throughout the project—small alignment errors become much more noticeable once the fence is complete.
Essential Tools for DIY Fence Installation
One of the biggest advantages of installing your own fence is that you don’t need an extensive workshop. Most projects can be completed using basic tools that many homeowners already own.
The exact tools depend on the fence type, but the following list covers nearly every DIY installation.
Measuring and Layout Tools
Accurate measurements are the foundation of a professional-looking fence.
You’ll need:
- Tape measure
- Mason’s string or string line
- Wooden stakes
- Marking paint or chalk
- Carpenter’s square (optional)
A straight fence line is much easier to maintain than trying to correct alignment errors later.
Digging and Post Installation Tools
Traditional fences require securely anchored posts.
Common tools include:
- Manual post-hole digger
- Shovel
- Digging bar (for rocky soil)
- Wheelbarrow
- Concrete mixing tub
- Tamping tool
If you’re installing a no-dig fence, you can skip most of these tools.
Assembly Tools
Almost every fence installation requires a few standard hand and power tools.
Recommended tools include:
- Cordless drill/driver
- Hammer or rubber mallet
- Socket wrench set
- Screwdrivers
- Pliers
- Utility knife
- Circular saw (for wood fencing)
- Staple gun (for wire fencing)
A quality cordless drill is one of the best investments for any DIY homeowner.
Leveling Tools
Nothing ruins the appearance of a fence faster than leaning posts or uneven panels.
Keep these nearby throughout installation:
- 4-foot level
- Torpedo level
- Laser level (optional)
Check each post before moving on to the next one.
Safety Equipment
Don’t overlook personal safety.
Recommended equipment includes:
- Safety glasses
- Heavy-duty work gloves
- Steel-toe boots
- Hearing protection when using power equipment
- Dust mask when cutting treated lumber
Taking a few simple precautions helps prevent injuries and keeps the project enjoyable.
Tool Rental Options
If you don’t own specialized equipment, renting is often more economical than purchasing.
Common rental costs include:
| Tool | Average Daily Rental |
| Power auger | $50–$100 |
| Post driver | $20–$40 |
| Concrete mixer | $40–$80 |
| Wheelbarrow | $10–$20 |
Many home improvement stores also offer free or discounted tool rentals when you purchase fencing materials.
DIY Fence Costs vs. Professional Installation
One of the primary reasons homeowners choose DIY fencing is the significant cost savings.
Labor often accounts for nearly half—or more—of the total cost of a professionally installed fence.
Material Costs by Fence Type
| Fence Type | DIY Materials (Per Ft.) | Professional Installed (Per Ft.) |
| No-Dig | $5–$15 | Usually DIY only |
| Wire Mesh | $6–$14 | $18–$34 |
| Bamboo | $2–$8 | $8–$16 |
| Chain Link | $8–$18 | $20–$35 |
| Pre-Fabricated Wood | $12–$25 | $25–$40 |
| Modular Metal | $10–$30 | $25–$45 |
| Vinyl | $15–$40 | $30–$60 |
As fence height, terrain complexity, and gate installations increase, professional labor costs rise accordingly.
Hidden DIY Costs
Although DIY saves money, it’s important to budget for additional expenses.
Potential hidden costs include:
- Tool rentals
- Material delivery charges
- Concrete and gravel
- Hardware upgrades
- Disposal of packaging materials
- Replacement parts for damaged materials
- Permit fees
- Property survey costs (if required)
Planning for these expenses helps prevent surprises midway through the project.
How Much Can You Save?
For many homeowners, the savings are substantial.
For example, a 150-foot backyard fence might cost:
Professional Installation
- Materials: $2,000
- Labor: $2,500
- Total: Approximately $4,500
DIY Installation
- Materials: $2,000
- Tool rentals: $250
- Miscellaneous supplies: $150
- Total: Approximately $2,400
That’s a potential savings of more than $2,000, depending on the fence type and local labor rates.
Beyond the financial benefit, many homeowners appreciate the flexibility to work at their own pace and the satisfaction of completing the project themselves.
Common DIY Fence Mistakes to Avoid
Even simple fence installations can go wrong without proper planning.
Here are the most common mistakes—and how to avoid them.
1. Skipping Utility Checks
One of the most dangerous mistakes is failing to locate underground utilities before driving posts or digging holes.
Hitting a gas, electrical, or water line can lead to serious injury, costly repairs, and project delays.
Always have underground utilities marked before you begin.
2. Ignoring Local Regulations
Many municipalities regulate:
- Fence height
- Materials
- Property setbacks
- Corner visibility
- Pool fencing
- Historic district requirements
Failing to comply could result in fines or even having to remove the fence.
Always verify local requirements before purchasing materials.
3. Installing on the Wrong Property Line
Never assume an old fence marks the legal boundary.
If property lines are unclear:
- Review your property survey.
- Locate boundary markers.
- Consider hiring a surveyor if necessary.
Correcting a misplaced fence is far more expensive than confirming the boundary beforehand.
4. Setting Posts Too Shallow
Fence posts provide the structural support for the entire project.
As a general guideline, posts should be buried about one-third of their total length, with additional depth in areas subject to frost or high winds.
Shallow posts are more likely to lean, shift, or fail over time.
5. Failing to Use a String Line
Without a guide, even small alignment errors accumulate.
A tightly stretched string helps ensure:
- Straight fence lines
- Even spacing
- Professional-looking results
Never rely solely on visual judgment.
6. Not Checking for Level
Every post should be checked in multiple directions before securing it permanently.
Once concrete cures—or once a no-dig post is fully driven—correcting a leaning post becomes much more difficult.
Take a few extra seconds to verify alignment throughout the project.
7. Rushing the Installation
Fence installation rewards patience.
Allow adequate time for:
- Careful measuring
- Accurate layout
- Proper post placement
- Concrete curing (when applicable)
- Final adjustments
A well-built fence can last for decades, making a little extra care worthwhile.
Final Recommendations
The best DIY fence depends on your priorities, budget, and experience level.
Choose a No-Dig Fence If You Want:
- The fastest installation
- Minimal tools
- No concrete
- A beginner-friendly project
- Temporary or decorative fencing
Choose Chain Link If You Want:
- Affordable property boundaries
- Durable pet containment
- Long-lasting performance
- Easy repairs
Choose Vinyl If You Want:
- Maximum privacy
- Minimal maintenance
- A clean, modern appearance
- A fence that can last 30–50 years
Choose Pre-Fabricated Wood If You Want:
- Traditional curb appeal
- A customizable finish
- Solid privacy
- Natural materials
Choose Modular Metal If You Want:
- Contemporary aesthetics
- Excellent durability
- Decorative front-yard fencing
- Low maintenance
Choose Wire Mesh If You Want:
- Garden protection
- Small animal enclosures
- Budget-friendly fencing
- Fast installation
Choose Bamboo If You Want:
- A tropical or natural look
- Eco-friendly materials
- Patio privacy
- Decorative landscaping
Frequently Asked Questions
What is the absolute easiest fence to install yourself?
A no-dig fence is the easiest option for most homeowners. These systems use ground spikes instead of concrete footings, allowing many projects to be completed in less than a day with only basic tools.
Can one person install a fence alone?
Yes, many smaller fencing projects can be completed by one person. However, having a helper is recommended for lifting larger panels, aligning posts, and installing gates safely and efficiently.
Which fence requires the fewest tools?
No-dig fences require the least equipment. In many cases, you’ll only need a rubber mallet or post driver, a level, a tape measure, and a string line.
What’s the cheapest fence to install yourself?
Bamboo fencing is often the least expensive option, typically costing $2–$8 per linear foot. Wire mesh fencing is another budget-friendly choice, generally ranging from $6–$14 per linear foot, making both excellent options for cost-conscious DIYers.
Do I need a permit to build a fence?
Permit requirements vary by municipality. Many areas require permits for fences above a certain height—often around 6 feet—or for fences installed near streets, easements, or swimming pools. Always check local regulations before starting your project.
How long does it take to install a DIY fence?
Installation time depends on the fence type and project size:
- No-Dig Fence: Less than 1 day
- Wire Mesh Fence: About 1 day
- Chain Link Fence: 1–2 days
- Vinyl Fence: 1–2 days
- Modular Metal Fence: 1–2 days
- Pre-Fabricated Wood Fence: 2–3 days
- Bamboo Fence: 2–3 days
Larger properties, difficult terrain, or custom gate installations may require additional time, but with proper planning, most DIY fence projects can be completed over a weekend or two.

Ahmed Ijaz runs this construction rental directory with over 5 years of experience in SEO, content, and web optimization. Every page is built using real research, hands-on expertise, and carefully reviewed information to meet strong EEAT standards.