This checklist exists for one fundamental reason: to protect your investment and ensure safety. A skid steer is a significant capital expense and a critical piece of equipment. A systematic, proactive maintenance routine is the most effective tool to maximize machine uptime, extend its operational lifespan, and ensure the safety of the operator and those working nearby.
There are many brands of skid steers and all of those have different maintenance needs.
This maintenance guide will transforms routine care from a reactive, forgotten task into a consistent, manageable process. By following it, you directly prevent costly repairs, reduce long-term operating costs, and maintain the machine’s resale value.
Other Links
- How Much Does Skid Steer Weigh?
- 37+ Skid Steer Attachments
- Tracked Vs Wheeled Skid Steer
- Smallest Skid Steer Models
- Porta-Potty Rental Cost
Safety Precautions Before Maintenance
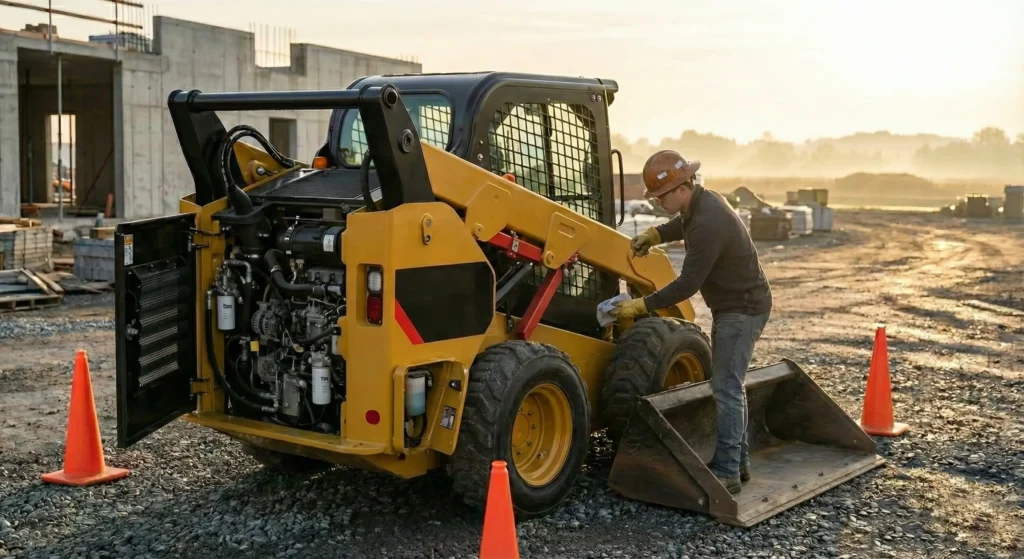
Never begin any maintenance procedure without first completing these critical safety steps. Your well-being depends on it.
- Park on a Level Surface: Engage the parking brake fully to prevent any movement.
- Lower the Attachment: Place the bucket or attachment flat on the ground. This relieves hydraulic pressure from the lift and tilt circuits and stabilizes the machine.
- Shut Down Completely: Turn the engine off and remove the ignition key. On electric machines, ensure the system is fully powered down and the battery disconnect is engaged if available.
- Relieve Hydraulic Pressure: After shutdown, cycle all control levers or joysticks (lift, tilt, auxiliary) back and forth to release any residual pressure trapped in the hydraulic lines.
- Block the Machine: If you must work under the loader arms or with an attachment raised, use approved lift-arm supports or solid stands. Never rely on hydraulics to hold components in place.
- Personal Protective Equipment (PPE): Always wear safety glasses, gloves, and steel-toed boots as a minimum.
Daily Checks
These are the non-negotiable inspections to perform at the start of each shift or after each fueling. They take 5-10 minutes and catch most major issues before they become failures.
- Engine Oil Level: Check with the machine on level ground and the engine off. Use the dipstick; add oil to maintain the proper level if low.
- Hydraulic Fluid Level: Visually check the sight glass or dipstick at the hydraulic tank. The fluid should be within the marked range when cold. Note its color; significant darkening or a milky appearance indicates a problem.
- Fuel Level: Refuel at the end of the day to prevent condensation from forming in a partially empty tank.
- Tires or Tracks Condition: For tires, check inflation pressure and look for cuts, embedded objects, or uneven wear. For tracks, check for proper tension (should have 0.5-1.0 inches of sag at mid-span), missing or damaged lugs, and excessive wear.
- Visible Leaks: Walk around the machine. Look for fresh puddles or drips of oil, hydraulic fluid, coolant, or fuel on the ground and trace them to their source.
- Grease Points: Lubricate all loader arm pivot points (main lift arms, bucket linkage), the quick coupler, and any other zerks before operation. Grease until clean grease purges from the seals.
- Air Filter Indicator: Check the restriction gauge on the air filter housing. If it shows red or indicates high restriction, service the filter.
Weekly Checks
Perform these checks once a week or every 50 operating hours.
- Battery Condition and Terminals: Check that the battery is securely mounted. Look for corrosion (a white, crusty buildup) on the terminals and cables. Clean with a wire brush and a solution of baking soda and water if needed.
- Coolant Level: Check the coolant reservoir with the engine cold. The level should be between the “MIN” and “MAX” marks. Never remove a radiator cap when the engine is hot.
- Belts and Hoses: Visually inspect the engine drive belt(s) for cracks, fraying, or glazing. Check tension—there should be about 1/2 inch of deflection when pressed firmly at the midpoint between pulleys. Scan all coolant and hydraulic hoses for leaks, bulges, or cracking.
- Wheel Lug Nuts or Track Tension: For wheeled machines, check that all lug nuts are tight. For tracked machines, re-check and adjust track tension as outlined in the operator’s manual.
- Radiator and Cooling Fins: Remove any debris (leaves, grass, dirt) from the radiator, oil cooler, and hydraulic cooler fins using compressed air or a soft brush. Blocked fins are a leading cause of overheating.
Monthly Checks
Conduct a more thorough inspection monthly or approximately every 250 hours.
- Engine Oil and Filter (if due): Refer to your service schedule. Change the oil and filter at the prescribed intervals, which often fall near monthly inspections for high-use machines.
- Hydraulic Hoses and Fittings: Run your hand along hydraulic hoses (with the machine off and cool) to feel for soft spots or brittleness. Check all fittings for tightness and signs of seepage.
- Electrical Connections: Check the tightness and condition of major connections at the battery, starter, and alternator. Look for any frayed or damaged wires, especially in high-flex areas.
- Drive Chains or Motors: On chain-driven machines, check chain case oil level. For direct-drive machines, inspect the condition of wheel motor seals for leaks.
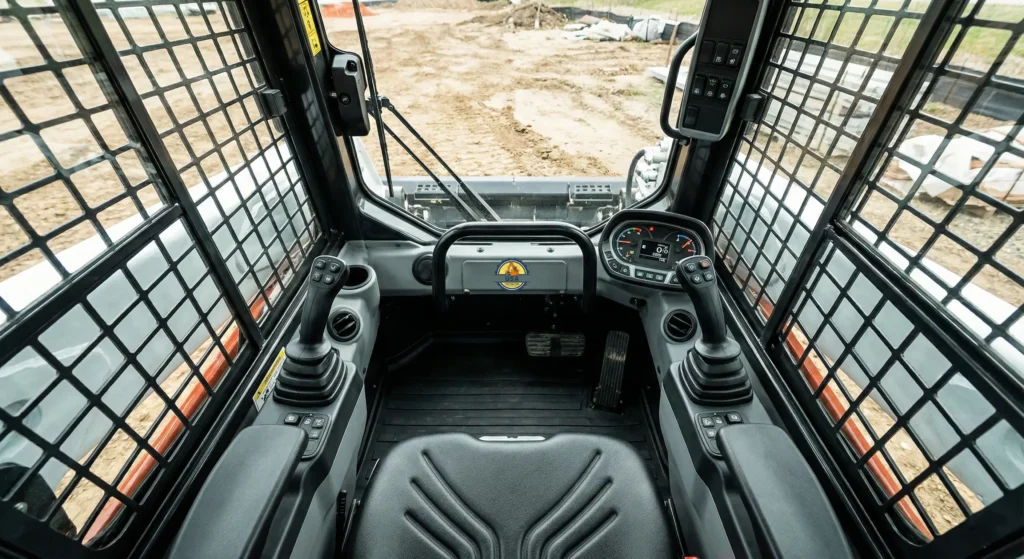
- Cab Controls and Safety Switches: Test the operation of all lights, gauges, and the horn. Ensure all safety interlocks function properly: the seat bar or seat belt switch must be engaged for the machine to move, and the parking brake must hold securely.
Scheduled Maintenance Based on Operating Hours
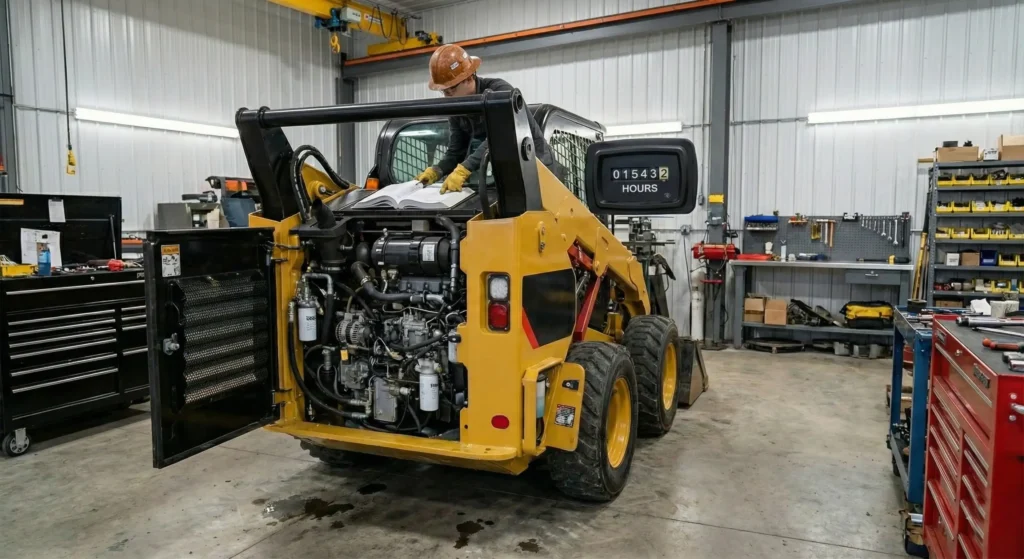
This is the core of your preventive maintenance program. Always prioritize the manufacturer’s manual, but this table provides a universal framework.
| Interval (Hours) | Primary Tasks |
|---|---|
| 50 (For new machines) | Change engine oil and filter (initial service). Grease all fittings. Check tire pressure/track tension. Inspect air filter. |
| 250 | Change engine oil and filter (routine interval). Inspect drive belts and hoses. Check axle/hub oil levels. Inspect cab air filter. Check battery connections. |
| 500 | Major Service including changing fuel filter(s) and hydraulic charge filter or reservoir breather cap. Inspect all belts and hoses. Thoroughly inspect the entire machine for wear. (Note: Hydraulic oil is typically changed later). |
| 1000 | Change hydraulic oil and hydraulic/hydrostatic filter. Change final drive/chain case oil. Change coolant per manufacturer spec. Comprehensive inspection of drive components, pins, and bushings. |
Manufacturer-Specific Requirements: Your operator’s manual is the final authority. Adhere to its specific fluid types, filter part numbers, and any special procedures for your machine model.
Attachment Maintenance
Attachments are expensive and failure can be dangerous. Integrate their care into your routine.
- Coupler Condition: Whether mechanical or hydraulic, inspect the coupler daily. Look for cracks in the casting, excessive wear on the locking mechanism, and ensure all locking pins move freely and are properly lubricated.
- Hydraulic Quick Couplers: Before connecting, wipe the male and female tips clean. Inspect the O-rings for nicks or flattening and replace them if damaged. Connect and disconnect a few times to ensure a positive seal.
- Attachment Pins and Wear Points: Grease all pivot pins on buckets, grapples, augers, etc. Check for visible wear or elongation in the pin holes, which can cause slop and reduce control.
Cleaning and Storage
Proper cleaning is maintenance; it prevents corrosion and lets you spot leaks.
Proper Cleaning Steps:
- Allow the machine to cool.
- Use a low-pressure water stream or pressure washer (from a safe distance) to remove mud and debris, focusing on the undercarriage, cooler fins, and hydraulic components.
- Never directly spray electrical components, bearings, or the exhaust system.
- Let the machine dry completely before storage.
Dealing with Hardened or Compacted Debris
A common and challenging issue is the buildup of hardened materials like frozen mud, packed clay, asphalt residue, or concrete on the undercarriage, wheels, and tracks. These materials can unbalance tires, add significant weight, strain components, and trap moisture against metal, accelerating corrosion.
Forcibly prying or hammering at this debris can damage hydraulic lines, sensors, and painted surfaces.The recommended method for removal is the controlled application of heat. Using a commercial heat gun on a high setting, carefully warm the impacted debris.
The goal is to expand the metal slightly and break the adhesive bond of the material, not to burn or melt it. As the mass heats up, it will often crack and begin to separate from the metal surface, allowing you to knock it away with a non-metallic scraper or brush.
Critical Safety Note: This task requires extreme caution.
Short-term vs Long-term Storage
- Short-term (Overnight/Weekend): Park on level ground, lower attachment, engage brake.
- Long-term (30+ days): Store indoors if possible. Perform all overdue services. Fill the fuel tank to prevent condensation. Add a fuel stabilizer. Grease all fittings generously. Block the machine up to take weight off tires/tracks. Remove the battery and store it on a tender.
Maintenance Record Keeping
A log is your machine’s health history and is crucial for resale and warranty.
- Log Service Dates and Hours: Use a notebook, spreadsheet, or maintenance app. Record the date, machine hours, and a description of every service performed.
- Track Parts Replaced: Note the brand, part number, and source of every filter, fluid, and component installed. This helps identify patterns and ensures you use correct parts in the future.
- When to Call a Professional Technician: Recognize your limits. Call a certified technician for: major engine diagnostics (loss of power, excessive smoke), complex hydraulic system failures, computer/controller issues, structural welding on the frame or loader arms, and any repair where you lack the proper tools or training. Safety and correctness are paramount.

Ahmed Ijaz runs this construction rental directory with over 5 years of experience in SEO, content, and web optimization. Every page is built using real research, hands-on expertise, and carefully reviewed information to meet strong EEAT standards.